Yes, drainage holes matter. They prevent water from pooling around roots, which causes root rot and fungal growth. Without drainage, excess moisture displaces oxygen your plants need. I recommend holes with saucers for most indoor plants—it’s the safest approach. If you’re set on decorative pots without holes, try double-potting with an inner draining pot, or use a gravel base with careful watering. Success depends on your commitment to moisture monitoring. Stick around to discover specific techniques that work best for your situation.
Do Planters Really Need Drainage Holes?

Why do so many gardeners insist on drainage holes? Because we’ve learned they’re necessary for plant health! When water pools in soil without proper drainage, roots suffocate and root rot develops—a serious problem indoors where airflow is limited.
Drainage holes let excess water escape and flush out harmful salt buildup that can damage roots. This reduces fungal growth and keeps your soil in better condition overall.
If you love a planter without drainage holes, don’t worry! I use inner pots with decorative outer containers. Just place a potted plant inside your beautiful pot, and you’ll get the best of both worlds: proper drainage and visual appeal.
This double-potting approach gives you confidence that your plants will remain in good condition while maintaining that polished look you want!
What Happens When Roots Stay Wet Too Long

When you leave roots sitting in wet soil for too long, you’re suffocating them—roots need oxygen just like we do, and waterlogged conditions displace the air pockets in soil that keep them healthy. This prolonged moisture creates the perfect environment for harmful fungi and bacteria to develop around your root zone, which can quickly lead to root rot that spreads through your plant. Understanding this oxygen deprivation is key to recognizing why drainage holes aren’t just a nice feature; they’re actually necessary for keeping your plants alive and vigorous!
Root Rot Development Process
When roots stay submerged in waterlogging conditions, they can’t access oxygen. Your plant’s roots suffocate and begin decaying within the wet soil. This creates the ideal environment for opportunistic pathogens like Pythium and Phytophthora to cause root rot.
The process happens quickly. Even short overwatering periods can initiate rot in susceptible plants, particularly in poorly draining soil. As oxygen becomes unavailable, roots turn mushy and brown while nutrient uptake gets blocked. You’ll notice yellowing foliage and detect a foul odor from the soil—signs that root rot has developed.
That’s why drainage matters for plant health.
Fungal And Bacterial Growth
Beyond root suffocation, prolonged wetness creates a perfect breeding ground for fungi and bacteria that compromise plant health. When you don’t have proper drainage, perched water sits around your roots, creating the exact conditions these pathogens need.
Here’s what happens in your waterlogged soil:
- Mold and fungal growth develop in damp, low-oxygen pockets, spreading disease to both foliage and roots
- Bacterial soft rot develops at the base and stem, weakening your plant from the inside out
- Blue-green algae spreads on wet surfaces, adding another disease pressure layer
The solution? Proper drainage removes perched water and improves air exchange around roots, stopping root rot and fungal problems before they start. When you invest in planters with drainage holes, you’re protecting your plants from these invisible threats and setting them up for success.
Oxygen Deprivation In Soil
While fungi and bacteria thrive in soggy conditions, another problem occurs beneath the soil surface: your plant’s roots are literally suffocating. When soil stays waterlogged, oxygen disappears from air spaces, and roots can’t breathe properly. This oxygen deprivation slows their respiration, drastically reducing the energy they need for growth and flowering.
Without adequate oxygen, root cells weaken and lose their ability to absorb water and nutrients—ironically, even though they’re surrounded by moisture. This creates root rot, a devastating condition that’s hard to reverse. Additionally, oxygen-starved roots may shed their fine feeder roots, compromising your plant’s stability and drought tolerance.
That’s why drainage holes matter so much. They’re not optional; they’re necessary for maintaining healthy soil oxygen levels and preventing these cascading problems.
How Drainage Holes Prevent Root Rot and Fungal Growth

Why do drainage holes matter so much for your plant’s health? They’re important for preventing two serious problems that can kill your plants: root rot and fungal growth.
Here’s how drainage works in your favor:
- Excess water exits, preventing the saturated soil conditions where root rot develops and roots suffocate
- Airflow improves through the root zone, eliminating anaerobic conditions that promote fungal decay and disease
- Salts and fertilizers flush out, preventing toxic buildup that weakens roots and invites fungal infections
When you pair indoor planters with drainage holes and saucers, you’re creating the right conditions. Water drains freely, mold can’t establish itself in wet soil, and your roots stay healthy. Plants prone to overwatering—especially tropical houseplants—absolutely need this protection. Drainage holes aren’t optional; they’re your plant’s best defense.
Why Some Gardeners Skip Drainage Holes Anyway

Despite all the benefits drainage holes provide, many gardeners deliberately choose pots without them—and they’ve got legitimate reasons! I understand the appeal of decorative pots that look great in your home without water pooling underneath. You can skip drainage holes by using liners or cachepots that protect your floors while keeping plants healthy. Self-watering containers with removable inner pots offer excellent moisture management without visible leaks. Some gardeners layer gravel at the bottom to simulate drainage naturally. The key is careful monitoring—you’ll water less frequently and watch soil moisture closely. Double-potting, where you nest a draining pot inside a decorative one, combines aesthetics with protection. With attention and the right setup, you can absolutely succeed with no-drainage planters!
Three Practical Solutions for Non-Draining Pots

How can you transform a beautiful pot without drainage holes into a suitable home for your plants? You’ve got solid options that’ll keep your plants healthy while preserving that aesthetic you love.
- Use a two-pot system: Place a drainage-equipped inner pot inside your decorative outer pot, then add a gravel layer to the bottom of the outer container. This setup elevates your plant and allows water to escape safely.
- Install a removable drainage insert: These cachepots sit inside non-draining pots, collecting excess water while keeping soil separated from standing moisture.
- Drill drainage holes carefully: If your pot’s material permits, create small holes near the bottom using proper safety precautions.
Each drainage solution protects your plants from root rot while keeping your decorative vision intact.
Check Your Soil Moisture Without Guessing

Once you’ve solved your drainage situation, the real work begins—figuring out when your plants actually need water. I’ve found that checking soil moisture removes the guesswork from watering schedules. Use the simple finger test: insert your finger about one inch into the soil. If it feels dry at that depth, water is due. If it’s still moist, wait. For precise readings, a moisture meter takes the uncertainty out of drainage management and prevents overwatering. Most plants thrive when the top one to two inches dry before rewatering. Different plants need different approaches—succulents prefer drier conditions, while tropicals enjoy humidity. Watch for overwatering signs like yellowing leaves, musty smells, or damp soil. This hands-on approach keeps your plants in good condition.
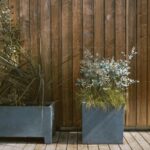
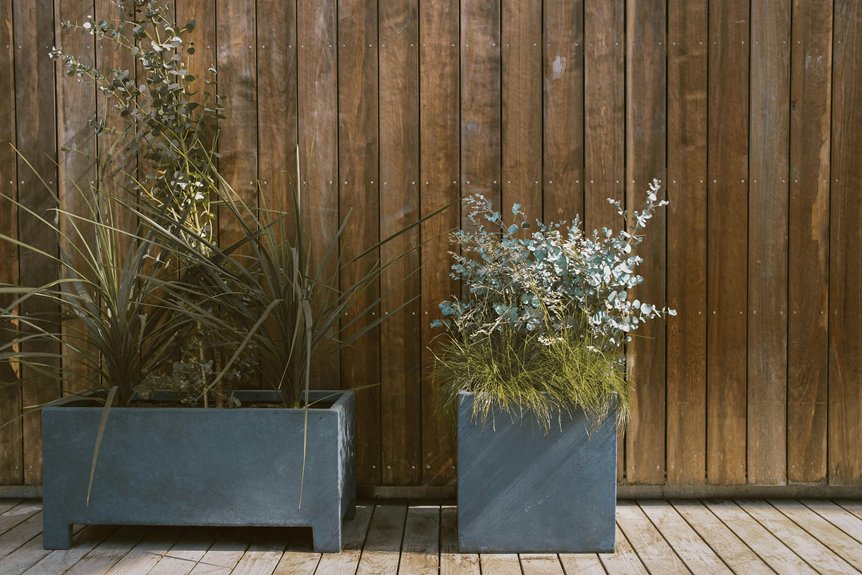
The Pot-Within-a-Pot Trick: Style Meets Function

Now that you’re confident about reading your soil’s moisture levels, you can focus on making your planters look beautiful without sacrificing drainage.
I use the pot-within-a-pot trick to achieve this balance. You’ll place a functional inner pot with drainage holes inside your decorative planter, creating the best of both worlds. Here’s how to set it up:
- Add gravel or a drainage layer to your outer decorative planter’s bottom
- Position the inner pot so it sits elevated above pooled water
- Remove the inner pot periodically to drain excess moisture from the outer container
This method keeps plants healthy while displaying them in decorative vessels. You’re not stuck with one look either—swap seasonal displays or accommodate plants with different drainage needs.
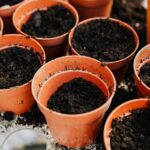
Build a Drainage Layer With Rocks and Soil

Creating a drainage layer is one of the smartest moves you can make for plant health, especially when you’re working with decorative pots or trying to maximize moisture control.
Creating a drainage layer is one of the smartest moves you can make for optimal plant health and moisture control.
Start by placing stones or gravel at your planter’s bottom. This foundation prevents soil from clogging drainage holes and creates space where excess water collects away from roots. I recommend using 1–2 inches of rocks, depending on your pot size.
Next, add your well-draining soil mix on top. Combine standard potting soil with perlite or vermiculite to boost aeration. This two-part system works together—the rocks handle water management while improved soil promotes healthy root growth.
The result? You’re building an environment where roots develop properly, not rot. Your plants will perform better.
Drilling Drainage Holes: Tools, Technique, and Safety

If you’re ready to give your favorite planter a second life, you’ll need the right tools and know-how to drill safely without damaging the pot or yourself. I’ll walk you through the essential equipment you’ll need, the precise techniques that’ll get you clean holes every time, and the safety precautions that keep your eyes and hands protected throughout the process. Let’s tackle both aspects so you can confidently transform any beautiful planter into one that’ll keep your plants healthy.
Essential Tools And Equipment
What’s standing between you and a potted plant that works well? The right tools! Creating drainage holes transforms any planter into a suitable home for your plants. You’ll want to gather these essentials:
- A ceramic or stone drill bit sized between 1/4 and 1/2 inch—perfect for most planters without cracking them
- Safety glasses to protect your eyes from flying debris during drilling
- A power drill with adjustable speed settings for controlled, precise work
Mark your planter’s center point with a pencil before you start. This prevents the bit from slipping and ensures professional-looking drainage holes. Moisture management becomes simple once you’ve drilled; excess water escapes easily, protecting your roots from waterlogging. You’re joining a community of people who understand that proper drainage holes are non-negotiable for success!
Safe Drilling Techniques And Precautions
Once you’ve finished drilling, smooth those sharp edges with fine sandpaper. Rough edges damage roots and let soil wash out during watering. If your planter has a hidden cavity inside, drilling may create weak points. Consider a liner or double-pot method instead. These precautions keep your planter sturdy and your plants healthy.
Why Soil Mix Matters More in Sealed Pots

How does your soil choice change when drainage holes disappear? When you’re working with sealed pots, your soil mix becomes your primary defense against root rot and fungal problems.
Here’s why the right blend matters:
- Air pockets prevent waterlogging — Adding perlite, vermiculite, or coarse sand creates spaces for water to move through, mimicking the natural drainage you’d get from holes.
- Organic matter needs balance — Compost improves nutrients, but too much compacts your soil and traps moisture. You’ll want roughly 30% drainage-enhancing materials mixed in.
- Moisture control becomes critical — Without drainage, you’re relying entirely on your substrate to manage excess water, making regular finger tests essential.
Think of your soil mix as the gatekeeper for sealed pots. Get it right, and your plants will perform as intended.
When to Water Plants in Sealed Pots?

You’ve got your soil mix dialed in—now comes the part that makes or breaks your sealed pot success: nailing your watering schedule.
With sealed pots lacking drainage holes, you’ll need to water more carefully than typical planters. I recommend checking soil moisture before watering—stick your finger about an inch deep. If it feels dry, water lightly until the soil is moist, not soggy. The key difference: you can’t rely on excess water draining away, so restraint matters tremendously.
For moisture-loving plants, sealed pots actually work well since they retain water longer. For succulents and cacti, I’d suggest watering even less frequently—maybe every three weeks. Monitor your specific plant’s response and adjust accordingly. This hands-on approach develops the skills that distinguish experienced indoor gardeners from those just starting out.
Spider Plants and Snake Plants Without Drainage Holes

Can spider plants and snake plants really grow without drainage holes? Yes! These resilient plants can tolerate no-drainage planters when you’re intentional about care. Here’s how to approach it:
- Water conservatively – Let the top 1–2 inches of soil dry between waterings to prevent root rot in sealed environments.
- Use a dual-pot system – Place an inner pot with drainage holes inside your decorative outer container to manage excess water safely.
- Choose sturdy materials – Fiberglass planters work excellently for no-drainage setups because they’re durable and pair well with cachepot systems.
The key is avoiding overwatering. By elevating your pot and using a drainage layer beneath, you’ll help water escape naturally. These plants are forgiving companions when you respect their moisture needs.
Where to Place Sealed Pots for Faster Drying

You’ll notice a real difference when you position your sealed pots in bright, warm spots with good air circulation—think sunny windowsills or patios where breezes flow freely. Placing them on elevated risers or stands keeps soil warmer and speeds evaporation by exposing the pot’s sides to air and light. Consider rotating your pots every few days if you’re using them indoors, since consistent airflow and warmth work together to prevent the moisture buildup that sealed containers inherently trap.
Light Exposure And Airflow
Where should I position sealed pots to help them dry faster?
You’ll want to strategically place your sealed containers to maximize both light exposure and airflow.
- Position pots in warm, bright locations – Direct sunlight increases evaporation from the pot’s surface, speeding moisture loss considerably and promoting drainage efficiency.
- Elevate containers on stands or porous surfaces – Lifting sealed pots improves airflow beneath them, allowing moisture to escape more readily than when sitting directly on solid ground.
- Space pots apart from one another – Grouping them together traps humidity around your plants. Spreading them out enhances air exchange, helping sealed containers dry noticeably faster.
Light-colored exterior finishes also reflect heat better than dark ones, further accelerating drying times. These positioning strategies work together, creating ideal conditions for moisture management without drainage holes.
Temperature Control Strategies
How much does warmth really matter when you’re trying to dry out a sealed pot? It matters tremendously! I’ve found that placing sealed containers in warmer, sunnier spots accelerates evaporation considerably. Position your pot near a window or in a heated room where natural light reaches it daily.
Here’s what I recommend:
Elevate your pots using feet or risers to boost airflow underneath, speeding moisture loss through improved drainage around the container’s base.
Space pots apart rather than grouping them together, which traps humidity and defeats your moisture management efforts.
Monitor regularly with a moisture meter or finger test, since sealed pots retain water longer than vented ones, even in warm conditions.
Combining warmth with strategic placement transforms how efficiently your sealed planters dry.
Decorative Shells With Draining Inner Pots

One effective solution to the drainage dilemma involves using a two-tier system: a decorative outer shell paired with a functional inner pot that drains properly.
This approach combines practicality with style. Here’s what makes it work:
- The inner pot features drainage holes that prevent root rot by allowing excess water to escape into the outer shell
- The decorative shell remains mess-free and attractive, masking any water accumulation while protecting your surfaces
- Easy maintenance lets you lift the inner pot for watering, then reseat it for a polished display
The key is ensuring your outer shell has a gap or drainage access so water doesn’t pool underneath. This setup gives you the benefits of both healthy roots and an attractive display that keeps your space looking intentional and well-maintained.
Drainage Holes or Workarounds: Which Is Right for You?

So you’ve found the perfect planter, but it lacks drainage holes—now what? You’re not alone in this dilemma! The choice between drainage holes and workarounds depends on your plant type and commitment level.
| Option | Best For |
|---|---|
| Drainage holes with saucers | Most indoor plants, beginners |
| Double-potting method | Decorative pots you love |
| Gravel layer base | Moisture-tolerant plants |
| Careful hand-watering | Experienced gardeners |
| No-hole pots | Short-term displays |
Non-drainage pots require diligence. You’ll need to monitor soil moisture closely and use root rot prevention strategies like gravel bases or liners. If you’re confident in your watering habits and choose moisture-loving plants, decorative no-hole pots work well. Otherwise, I’d recommend pairing drainage holes with external saucers—you get both function and style without the stress!